Mastering the Art of Paper Craft: Getting the Most Out of Your Junk Journal Folio Templates Mega Kit
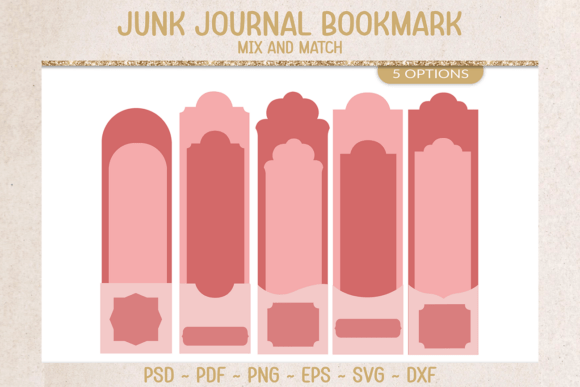
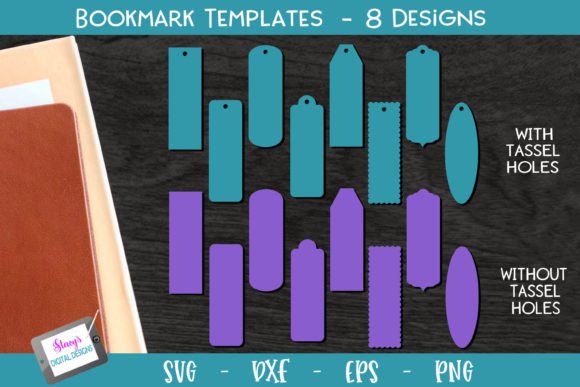
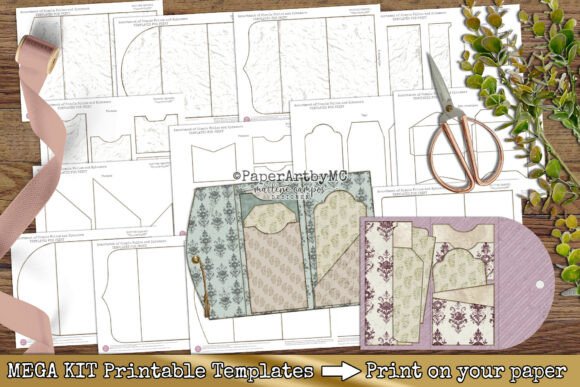
There is a specific kind of magic in holding a hand-assembled junk journal. The weight of the paper, the texture of the pockets, and the vintage aesthetic create a tactile experience that digital notes simply cannot replicate. For many paper crafters, scrapbook artists, and beginners, the allure is undeniable, but the execution can often feel daunting. This is where a comprehensive resource like the Junk Journal Folio Templates Mega Kit becomes an indispensable ally. It bridges the gap between creative vision and the technical reality of construction, offering a wide variety of printable templates for folios, pockets, envelopes, tags, and inserts designed specifically for 8.5x11 paper.
However, possessing the tools is only half the battle. Even with a premium mega kit that includes high-resolution PDFs, vintage distress ink edges, and detailed instructions, the final result often hinges on the decisions made before the scissors ever touch the paper. Many creators rush into the printing process, treating the templates as simple coloring pages rather than structural blueprints. To truly elevate your paper crafting projects from amateur attempts to professional-looking ephemera, you need to understand the nuances of material selection, printer settings, and assembly techniques.
The Foundation: Why Material Selection Matters More Than You Think
The most common mistake I see among junk journal enthusiasts—both beginners and those with experience—is the skimping on paper quality. It is tempting to reach for standard 20lb copy paper sitting next to the printer. After all, the templates fit the page, so why not? The reason is structural integrity. A junk journal is meant to be handled, stuffed with mementos, and flipped through repeatedly. Standard copy paper will tear easily under the weight of glue or the friction of pages rubbing against each other.
The Junk Journal Folio Templates Mega Kit is designed with specific dimensions—measuring 4.5x7—which implies a certain heft is required to support the design. We recommend using 220 gsm craft cardstock for a sturdy finish. This weight provides the rigidity needed for envelopes and pockets to hold tags and ephemera without collapsing. If you use a lighter paper, the vintage distress ink effect included in the kit may bleed through or cause the paper to warp when the ink hits it, ruining the "wrinkles effect" aesthetic you are trying to achieve.
Understanding Your Printer: The Bridge Between Digital and Physical
Another overlooked detail is the compatibility between the file format and your printing hardware. The kit comes in High Resolution PDF files, which is the industry standard for print consistency. However, the advice to "print on your favorite papers" requires a bit of technical understanding. Not all home printers are created equal.
For best results, the instructions suggest using an inkjet printer such as an Epson EcoTank or Smart Tank. There is a practical reason for this. Laser printers use heat to fuse toner to paper. While great for text, this heat can sometimes cause heavier cardstock (like the recommended 220 gsm) to curl or jam, and it does not always absorb into textured papers the way ink does. Inkjet printers, particularly tank systems, lay down liquid ink that soaks into the fibers of the cardstock. This creates a richer, more authentic vintage look that blends seamlessly with the distressed edges provided in the templates.
If you attempt to use a standard cartridge-based inkjet with heavy cardstock, you may find that the ink smears immediately upon exit because the printer lacks the drying time or feed path clearance for thick media. This leads to wasted paper and frustration. Before starting a large batch, always run a single test page on your chosen cardstock to ensure the feed rollers can grab the paper and the ink dries without smudging.
The Double-Sided Printing Trap
One of the standout features of this mega kit is the ability to print double-sided with included background designs. This creates a professional look where the inside of a pocket or the back of a folio is just as beautiful as the front. However, this is where many projects go wrong.
Double-sided printing requires precise alignment. If your printer pulls the paper slightly off-center when feeding the page back through for the second side, your vintage borders will be misaligned, and the margins will look uneven. This destroys the illusion of authentic, found ephemera.
The Better Approach: Do not rely on your printer’s automatic duplex setting if you are using thick cardstock, as the paper path for duplexing is often too tight and can cause jams. Instead, print the first side, let it dry completely (at least 10-15 minutes for inkjet on cardstock), and then manually feed the paper back into the tray for the second side. Pay attention to the orientation—usually, you need to flip the paper along the long edge, but check your specific printer’s manual. It is a slower process, but it guarantees that your background designs line up perfectly with the foreground elements.
Assembly: Beyond the Cut and Fold
Once you have successfully printed your folios, pockets, and ephemera, the assembly phase begins. A frequent oversight is the lack of reinforcement. A paper pocket is just a folded piece of paper until it is secured. For a junk journal that will be used and loved, relying solely on glue dots or tape runners often leads to pockets peeling away from the page after a few weeks.
Consider the following enhancements to ensure longevity:
- Stitching: If you are binding your journal with thread, use a needle to sew the pockets directly onto the signatures. This adds a handmade, rustic feel that complements the vintage distress ink style of the templates.
- Reinforced Edges: Before gluing down a pocket, fold the top edge (the opening) over a thin strip of cardstock or washi tape. This prevents the pocket from tearing when you slide tags in and out.
- Drying Time: When using wet glues (like PVA), place the assembled items under a heavy book while they dry. This prevents the pages from buckling and ensures the "wrinkles effect" remains intentional rather than accidental warping caused by excess moisture.
Evaluating the "Value" of a Mega Kit
When looking at a product like the Junk Journal Folio Templates Mega Kit, it is easy to get overwhelmed by the sheer volume of content. You might wonder if you need 22 printable templates or if a smaller set would suffice. The value here lies in versatility. A mega kit allows you to create a cohesive theme across an entire project. You can use the assorted blank and wrinkles effect pockets for storage, the ephemera belly bands for bundling items, and the tags for labeling.
However, a mistake beginners often make is trying to use every element in a single journal. This leads to visual clutter. A better approach is to curate. Select a specific color palette or style from the kit for one project. Perhaps you use the "Vintage Distress Ink Edge" style for a summer travel journal, and save the "Assorted blank" style for a clean, minimalist recipe book. By treating the mega kit as a library of assets rather than a mandatory checklist, you extend the life of the purchase and maintain a cleaner aesthetic in your finished work.
Final Thoughts on Crafting Success
Paper crafting is a rewarding hobby that allows for immense personal expression. Tools like the Junk Journal Folio Templates Mega Kit simplify the technical barriers to entry, allowing you to focus on the creative side. However, respecting the materials—using the right weight of cardstock, calibrating your printer settings, and taking your time with assembly—will always separate a good project from a great one. Avoid the rush to print and cut; instead, invest in the preparation. Your future self, holding a sturdy, beautifully bound journal, will thank you for the patience and the right choices made today.